Like this? Follow me:

Stats:
- 33.1 Miles
- 15,085’+ elevation
Total time:
- 2 days 25min
Six Centennials summited:
- Ellingwood Point
- Little Bear Peak
- Blanca Peak
- “Huerfano Peak”
- Mt. Lindsey
- California Peak
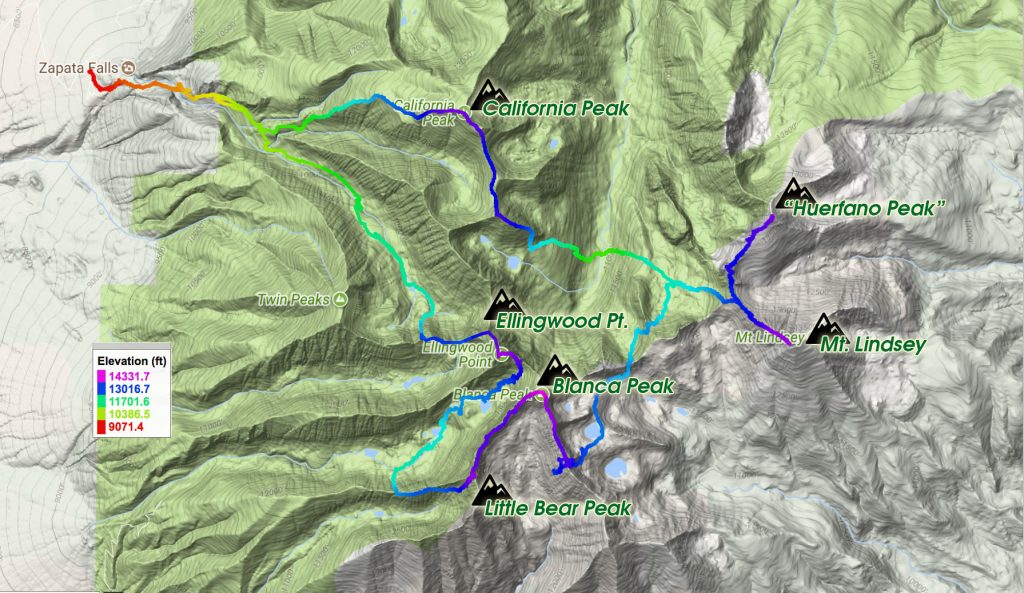
To make the Tour of the Highest Hundred work, my general strategy was to keep the number of separate trailheads I needed to visit by bike as low as possible, while designing my route on foot to tag as many mountains in an area as possible. Transitioning to/from bike-mode/hike-mode and superfluous riding are big time sucks.
One of the largest puzzles is the Sierra Blancas. Even enthusiastic peak baggers will separate this group of mountains into >= two trips:
- Approaching from the east for Mt. Lindsey and “Huerfano Peak” via the Huerfano/Lily Lake Trailhead
- Approaching from the west to access Ellingwood Point, Little Bear, and Blanca via Lake Como Road
- And well, also approaching from the west for California Peak (if the Centennials are part of your goal), which is accessed from an altogether trail head: Zapata Falls.
Three different trips to three different trailheads is a lot of bike riding for six mountains that sit close together. Visiting the eastern trailhead, then the western ones means either crossing a northern mountain pass (Mosca Pass), or going around the entire southern end of the Sierra Blancas (La Veta Pass) – I was willing and needed to do one, but not both.
Lake Como Road
Of the three trailheads presented, Lake Como Road was the least attractive. It’s possible to ride a mountain bike pretty far up the road, but with all the gear I was carrying, the elevation I could realistically reach was low before I would then be pushing the bike with all my gear. The road is exposed to the sun/heat, and it’s a fairly terrible slog for anyone to do in the middle of the day.
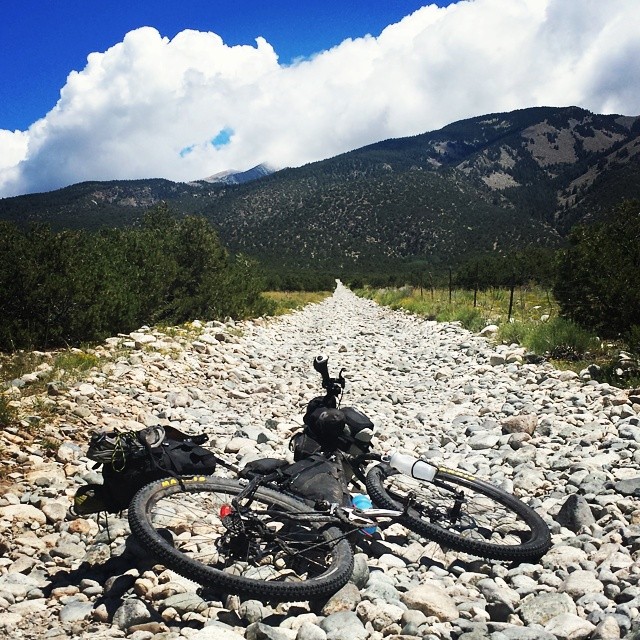 The baby heads of Lake Como Road, 2014
Rather, for steep/loose trails – even if they’re rideable, I found that I prefer to leave a good chunk of my gear at the trailhead (the bike!) and hike with a smaller load – it’s just way more efficient. Not using Lake Como Road is a missed opportunity in one way though: a free ride downhill riding/coasting on the bike! But, the road is so rough and filled with baby head rocks; there’s a good chance you’ll damage a wheel, and be hiking out to the next town for repairs – a huge time penalty, and perhaps not worth the gamble. I’ve done the road before within incident, but Joe Grant managed to inflict some damage to his wheel on his Tour de 14ers, which required limping into Alamosa to hang, while a new wheel was expediently sent to him.
Lily Lake/Huerfano
Lily Lake/Huerfano was also not as attractive to me, as it was on the east side of the range. The turnoff for this trailhead is between my starting point and Culebra, and I needed to get to Culebra at a specific date – I couldn’t be late (or early!). There’s a bit of extra out-and-back needed to access Lily Lake TH, but it’s on a good road, and it’s only a few miles. The problem really is, could I be confident I could time this 6-peak enchainment to perfectly fit in the time I had before visiting Culebra? Honestly, I couldn’t. Given the horrible weather I was experiencing, I could realistically be out there for a day longer than planned. I had also planned on accessing the Crestone group from the west since Mt. Adams is much more easily summited from the town of Crestone, so it would be more convenient to access both from the west, instead of one group from the east, and one from the west.
Zapata Falls
The last option, Zapata Falls, seemed much more attractive to me. I could visit it right after Culebra, and have an open amount of time to finish things up. From Zapata Falls, there is a non-standard route to Ellingwood Point via the “C2” or “C3” couloir. Normally, this is an out and back to the same trailhead as you began, as tagging any other peaks in the area – Blanca for example, would require you to also re-summit Ellingwood Point. So, tagging Blanca and Little Bear and returning to Zapata means a bonus 14er to summit. A little extra work, but not too bad. Hmm.
The problem is, this doesn’t solve getting to Mt. Lindsey/”Huerfano Peak”, as doubling back moves you farther away from those mountains. From Ellingwood Point, it looks like following the ridgeline to California Peak would work, but I have little beta on it – it’s worth a recon though and from talking to others, with careful route finding it goes at Class 4.
Another option is to drop down almost to the beginning of the Zapata Falls trail, losing most of the elevation gain you managed to acquire, and hike up California Peak via it’s west ridge from the northern basin. Yikes, not so attractive. With such an enchainment, it would be nice to get a looped tour of the area, and have as little backtracking done as possible.
If you can get to Blanca Peak via Ellingwood Pt. (then Little Bear), there is an opportunity to drop down east to the other side of the range via Gash Ridge (or a Class 4 alt.) to tag Lindsey/”Huerfano Peak”. If you have the luxury of starting on the west side of the ridge and ending on the east (using a two car shuttle, for example), the problem is solved: you can then descend all the way to the Huerfano/Lilly Lake trailhead. If not, you’ll have to figure out have to get back west – and that’s really the crux of this whole idea: how do you get back west?
Retracing your steps means having to resummit both Blanca and Ellingwood Point, and descending the C2 couloir – and you still haven’t summitted California! You need to go from Lindsey/”Huerfano” to California. Because you traverse the entire range, I would guess this is rarely done – only the most masochistic would want to summit California Peak from the southeast.
So, that’s what I did.
Below is a description of the route I took – but fair warning: it’s not a suggestion of a route you should take yourself. I flubbed a few things up, and would do this a bit differently if I was to do it again. Perhaps it’s of use to help plan your own enchainment and answer some questions you yourself may have on the terrain around the area.
Here we go:
Rolling up to the Zapata Falls TH, I found the campsite area, and the camp host. After introducing myself, and my project, I ask nicely if I could leave my bike with them, the alternative being “locking” it to a tree. I’ve found that camp hosts generally are more than happy to help out – I’ve even had some approach me before I could approach them and offer to look after the bike. This takes a load of worry off my mind, and let’s me focus on the fastpack I have to do. Treat your camp hosts well!
It was also a point of contact – I could tell a real live human that knows the area my plans, and ETA on when I should be back. I even drew him a little map. Of course, the camp host had a brother, who worked and/or owned the closest mountaineering store, so if I needed extraction, he could be of help.
From the campsite, I started fastpacking towards the South Zapata Lake Trail – my line missed the actual falls, and is somewhat of a shortcut to get to the meat of the route itself by about a half a mile. I also missed quite a few tourists that wanted only to see the falls!
The trail starts out in a pretty arid environment – sagebrush, prickly cactus and ponderosa pines; but that soon gives way to much larger and denser foliage as you make your way into the canyon. ~1.8 miles in, there is a turnoff for a very faint trail to your left/north (there may also be a cairn), which will lead you onto a trail that follows the North Fork South Zapata Trail (careful with these names). If everything goes well, this should be the trail I’ll be hiking out from.
Passing this junction, I hiked all the way up the South Zapata Lake Trail, until around treeline and very near South Zapata Lake itself, but then was stymied by a passing thunderstorm. The last group of trees makes a good camp spot, and I hunkered down a bit, waiting for the weather to hopefully pass, burning precious daylight. If the weather didn’t look like it was going to improve, I would be stuck here for the night, less than 5 miles from the trailhead.
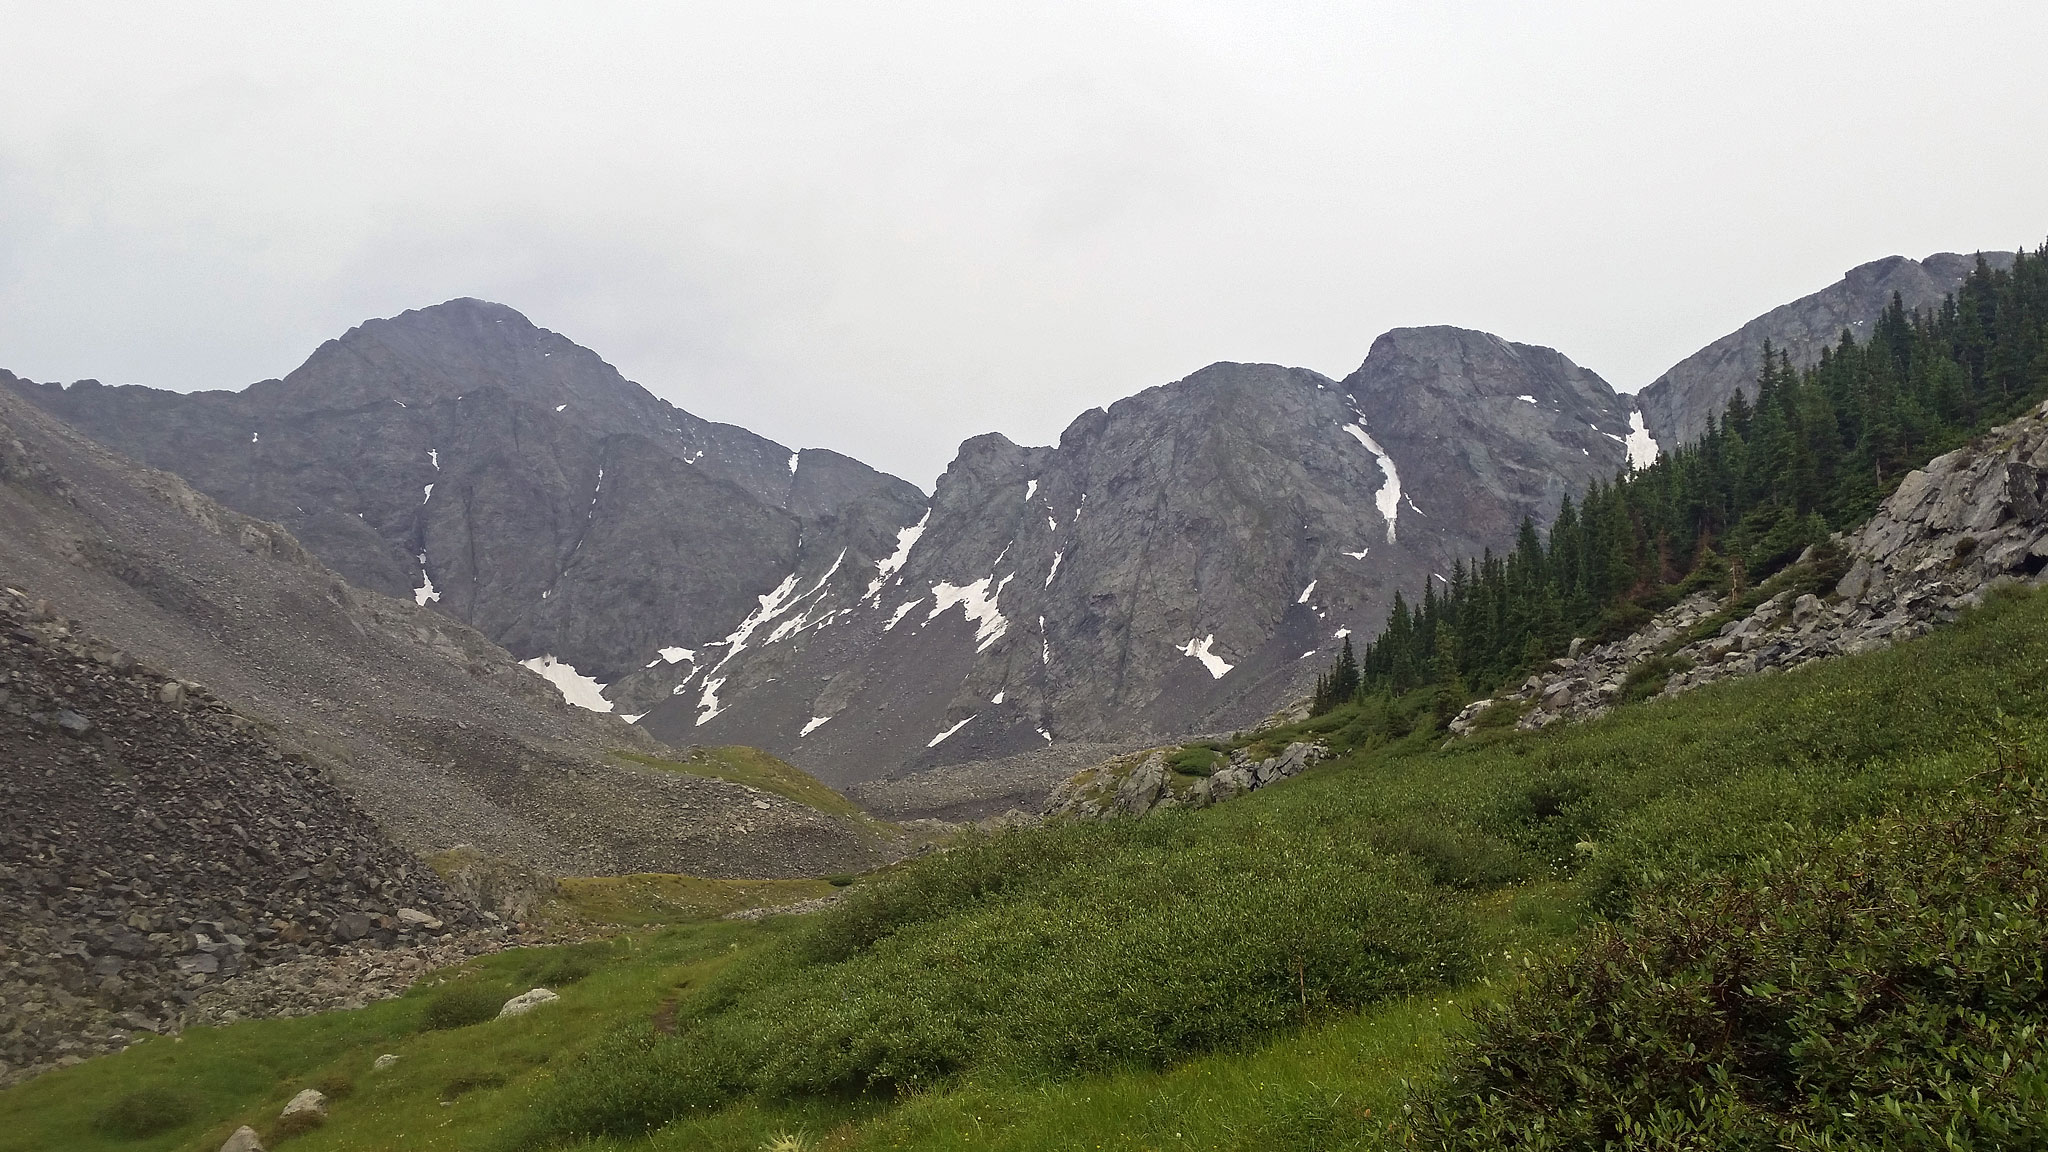 Ellingwood from South Zapata Lake
This temporary cautionary downtime at least gave me some space to look at the rest of the route, as I had never been up in this basin. C2, unfortunately for me, looked pretty packed with snow, and I was without any gear to climb it. I couldn’t tell the condition of the snow either, but being late in the day, it probably wasn’t the best. I didn’t feel like risking it, although turning back seemed even less attractive.
With the weather sort of holding, I decided to go for it, and try to find the C3 couloir. It’s a longer in distance option, which makes it less attractive for me, but if it’s snow-free, I’m game. Problem is, the couloir isn’t visible from this vantage point, so you kinda gotta have faith it’s there – I didn’t have a track or a waypoint, and the name, “C3” is not an official name, so you’re not going to find it on any USGS map.
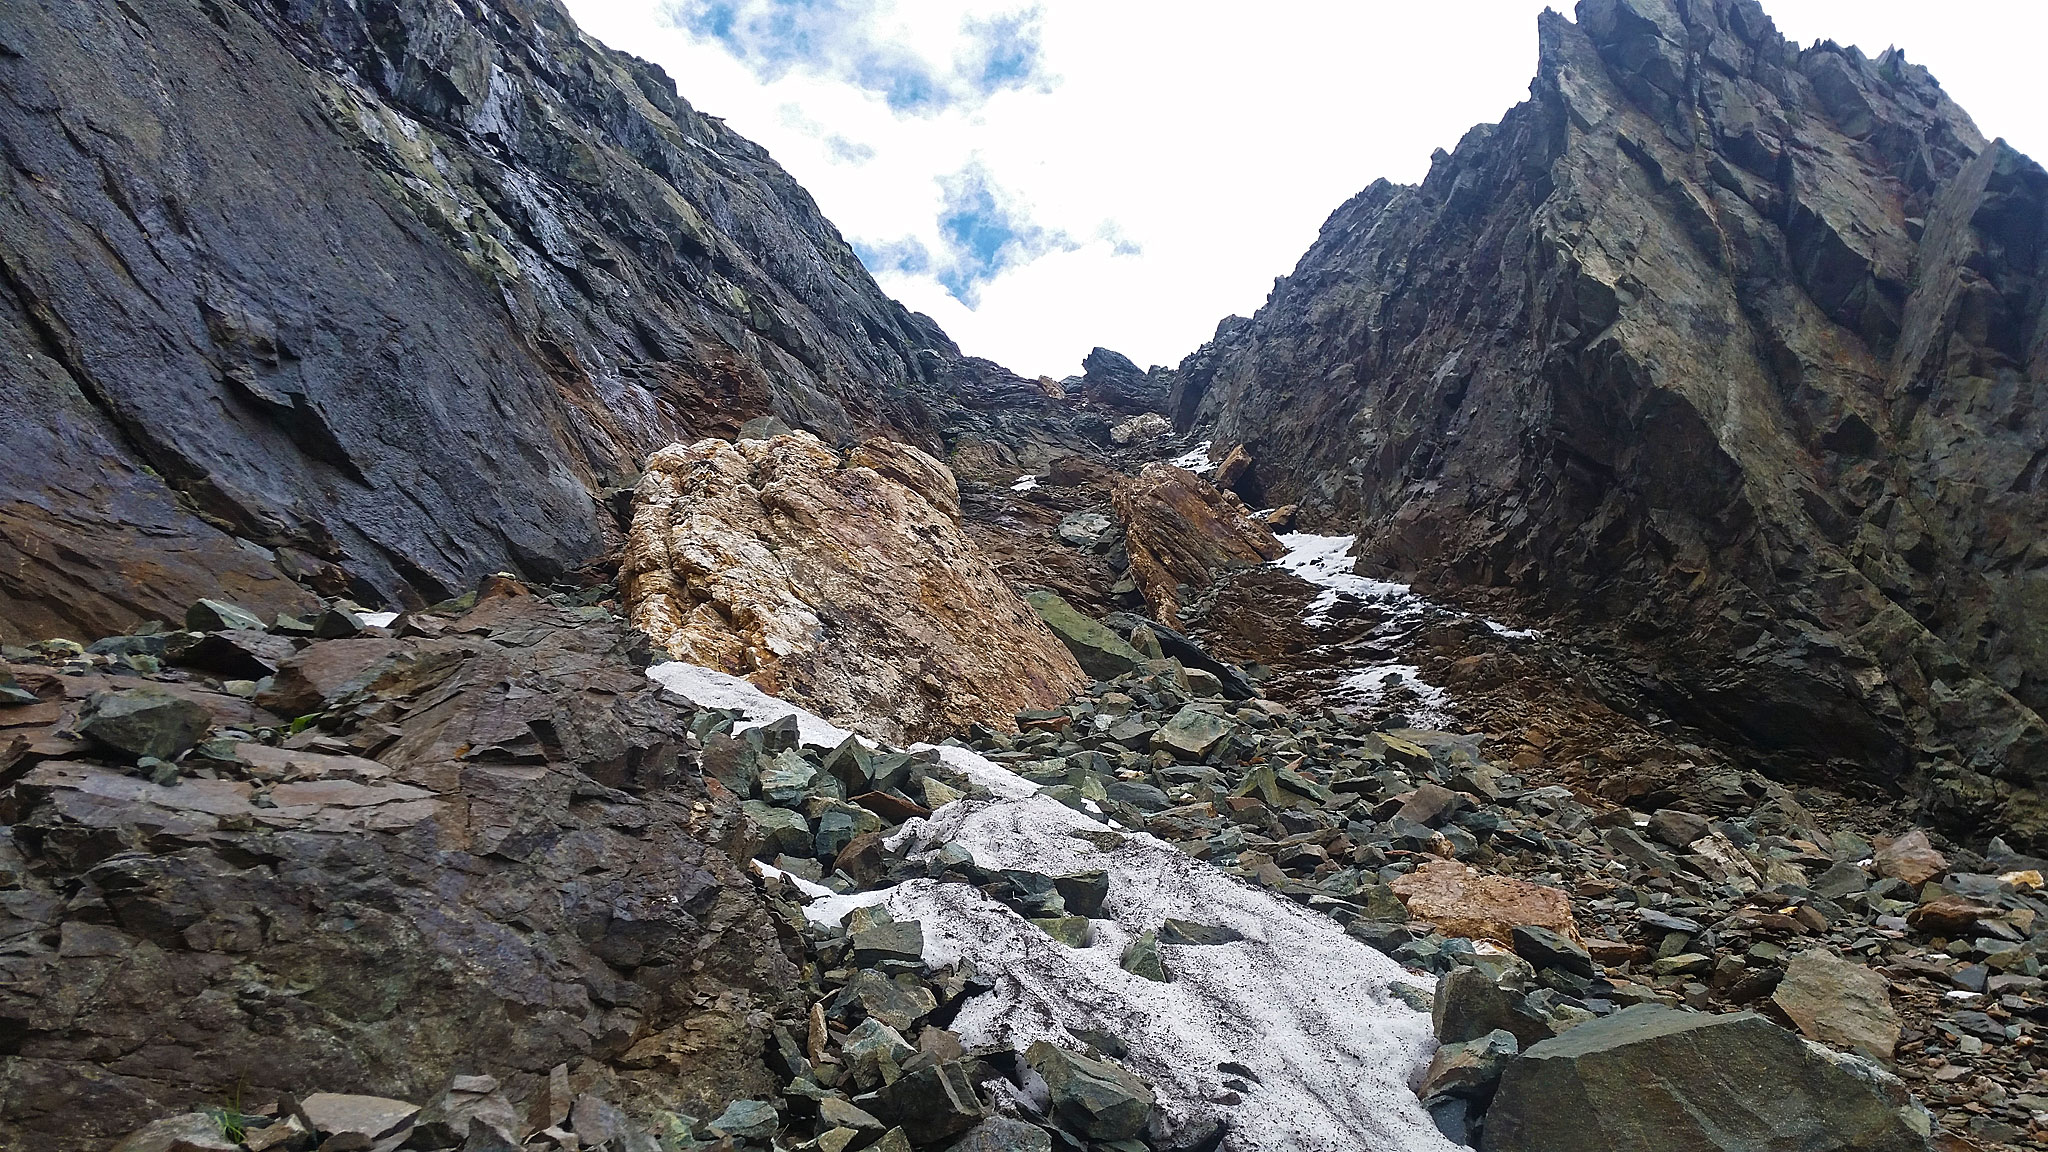
Hiking from the lake to the base of the couloir is very loose – basically morraine material, and hiking up the couloir itself was miserably loose. And sure enough, at the midpoint up the couloir was snow. The couloir was much narrower and steeper than I was expecting. Hmm – I might not be in the right chute!
A bit committed to the line I was on, I kept going, until the couloir seemed to get even steeper, and I began to feel a bit unnerved. Somewhere around this time, I lost the tip of one of my trekking poles – damn! I cheaped out and brought along a very used (some would say, “used up”) pair of trekking poles, instead of buying new ones. I’ve had this problem with the poles before. I wasn’t expecting to hit snow like this on any route of my entire trip, but of course, I did, and had this little setback happen. My fault.
Not wanting to go up the snow-filed couloir, and not wanting to head down either (it was that loose), I made the “obvious” choice to traverse left onto the face itself, and try out the gravely, slabby, rock and see if that would go. Transitioning from snow to rock was tenuous. As the snow got thinner towards the rock, so was my purchase onto anything that held my weight. I had to jump from the last vestige of snow, over some ice, and onto solid…ish rock. I’m writing this, so it worked, but messing that up would have been a bad ending to my trip, as I would have surely tumbled down the slabby face below.
The rock on the face was less than ideal: wet in some places, and loose in most others. But, the angle wasn’t treacherously steep, and there were cracks and holds. I was starting to race the last of my daylight, so I tried not to dawdle – and tried not looking down. Fun 5.easy slab climbing!
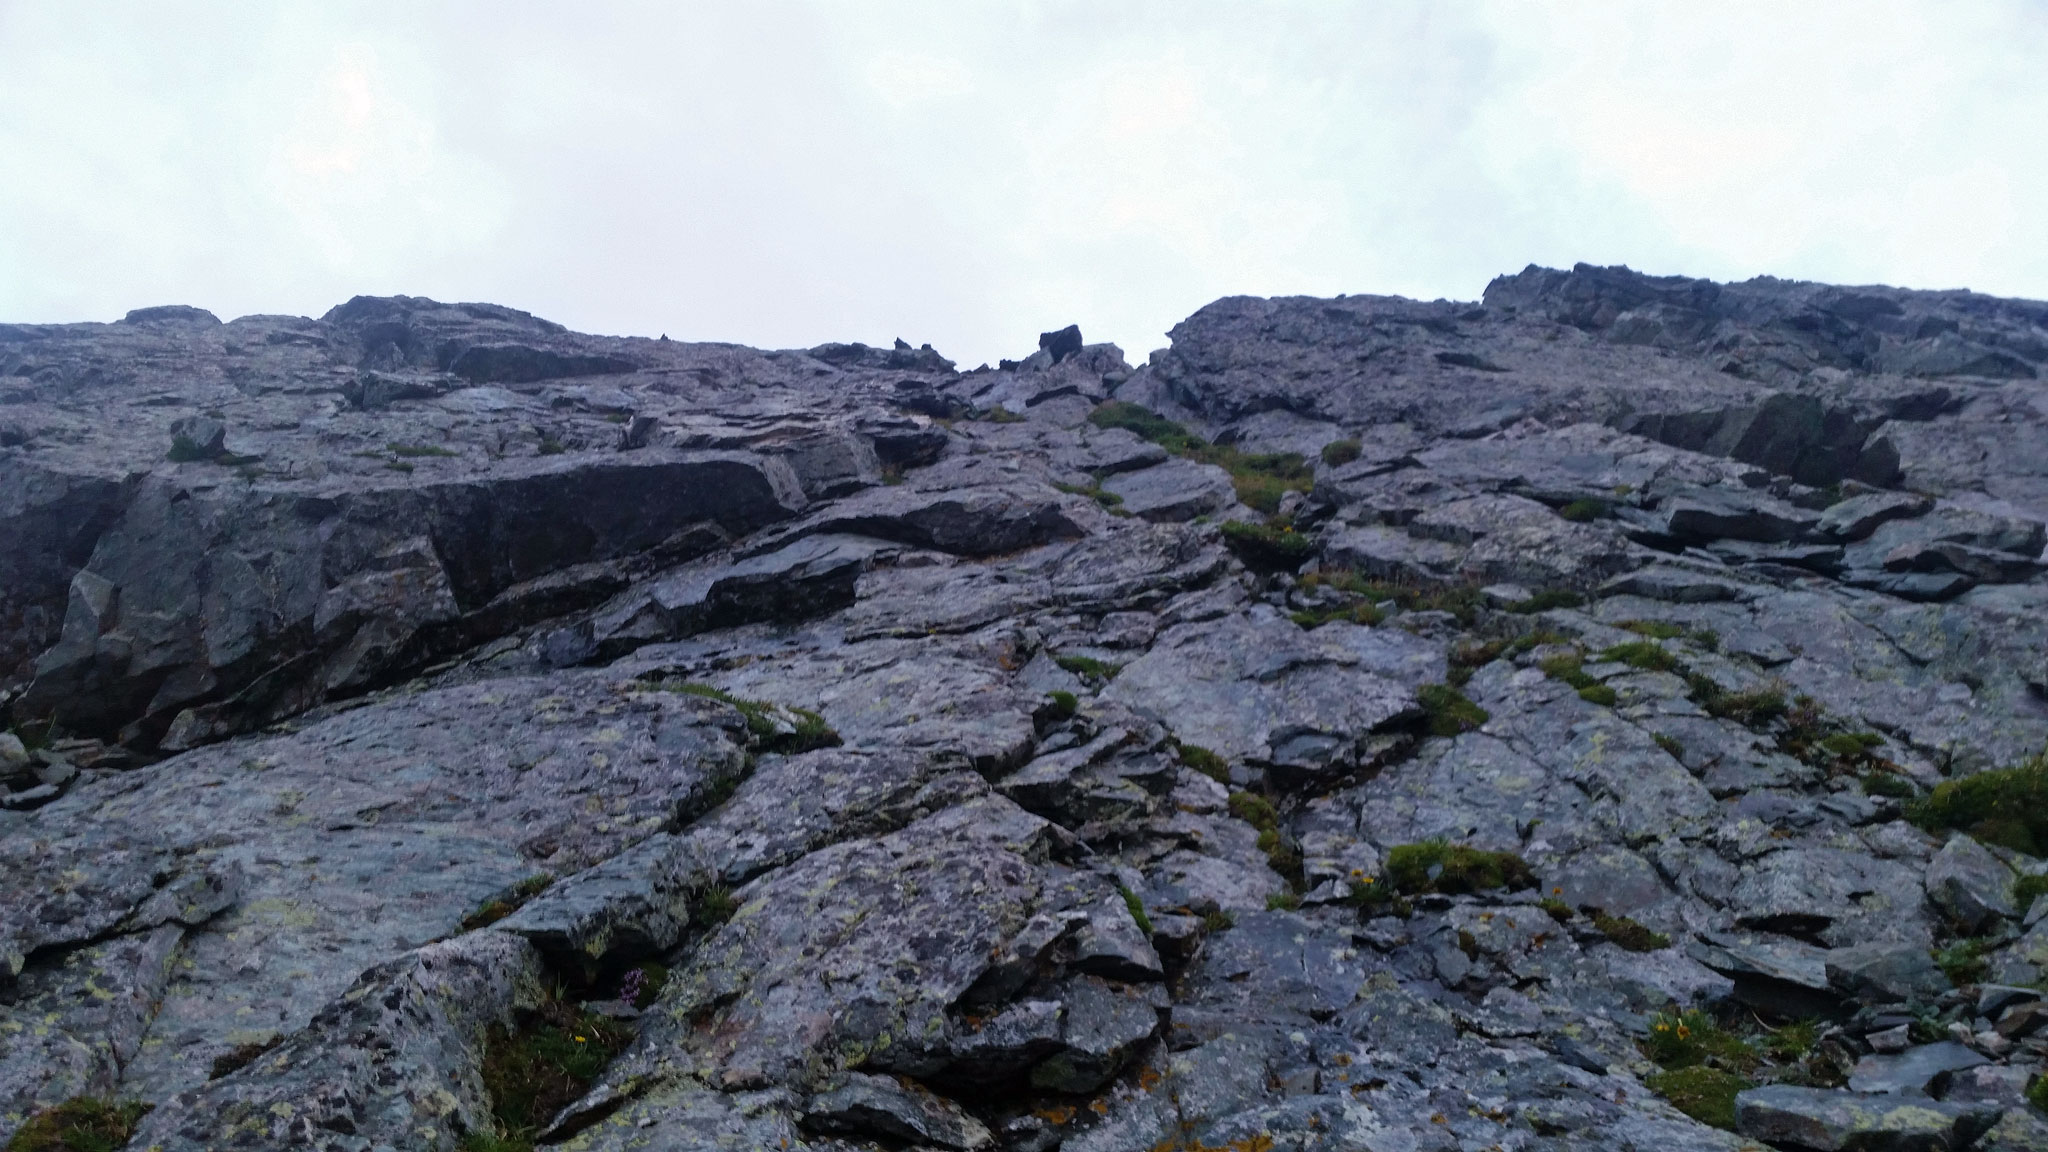 Who needs loose gullies, when loose faces work just as well, or better?!
With careful route finding, I gained the ridge and could take a breather. Descending that wasn’t going to happen, so it was onwards towards Ellingwood. The ridge scrambling was much easier, even though nightfall was happening quickly, and the weather wasn’t going to afford me a starry sky.
Looking at trip reports and route descriptions, I’m almost positive I didn’t ascend C3, but took a much more narrower gully between C2 and C3 – let’s call it “C2.75” for now!
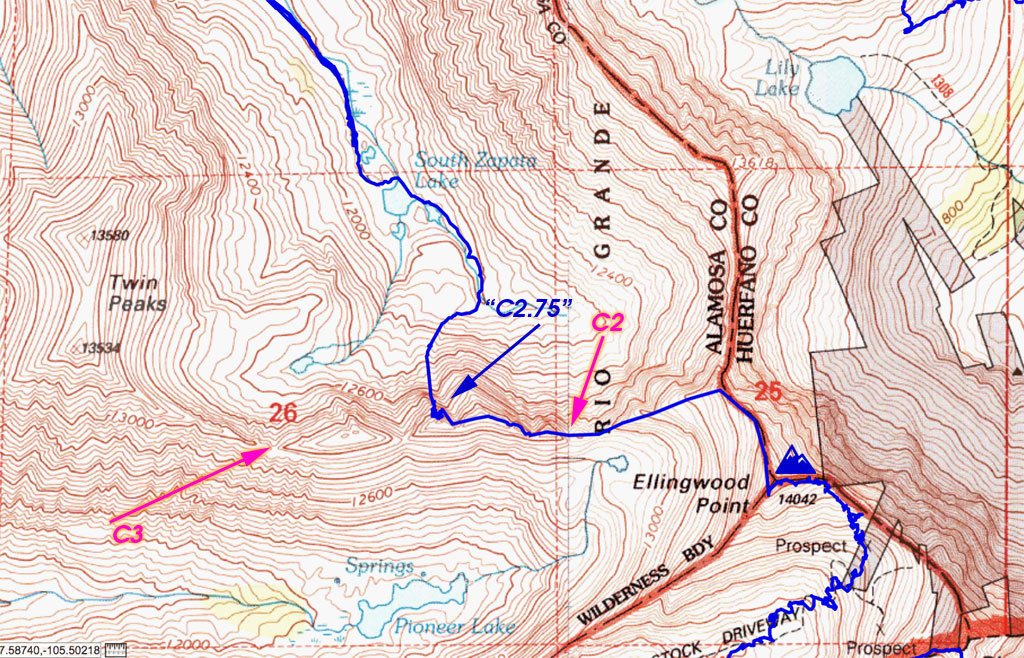
There may have been more to my decision of taking the face after a while – perhaps from the bottom, “C2.75” didn’t look reasonable to top out of, maybe there was loose rock, or a cliff band at the top I didn’t want to deal with. Or maybe, hell, I wanted a bit more excitement to my day.
Of course, as I made my way traversing the ridge towards Ellingwood, I passed C2, and the angle of the gully with snow looked doable enough even without proper snow climbing gear from above – who knows? Pack a light ice axe, and some traction, and you’ll be fine. Having to haul all the gear I needed for two months on a bike and having to make those difficult decisions on what not to bring, I just didn’t have the snow gear on this trip.
Night fell, with fog and intermittent snow, and I was all alone on the ridgeline, except for a camp light far, far below me near Lily Lake. The scrambling was fun and easy enough on the ridge – I actually summited Ellingwood Point before realizing it – I had to backtrack as the ridgeline seemed to continue to lose elevation, instead of gaining it. Success!
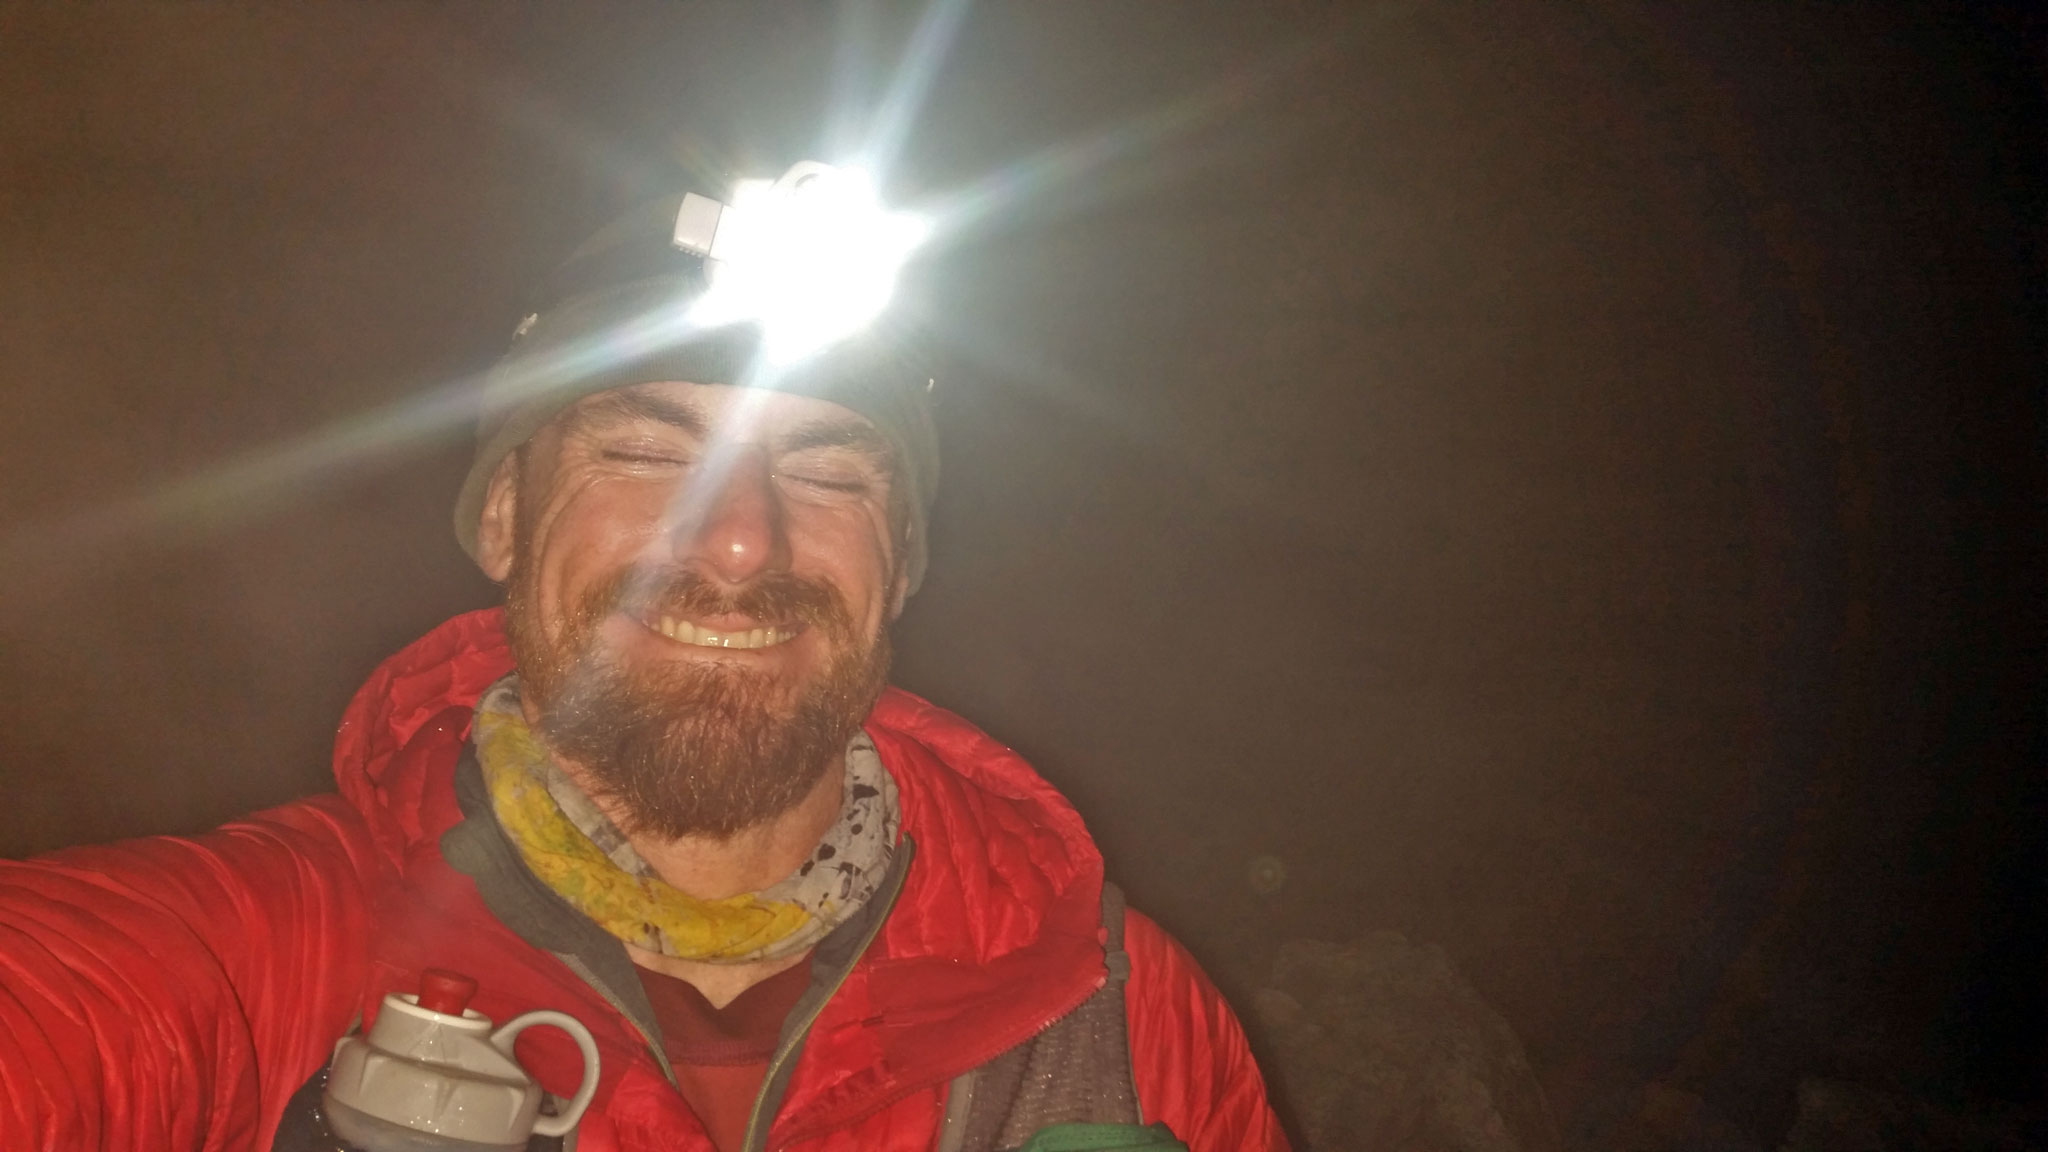 Foggy late night summit on Ellingwood with Mr. Photogenic, here.
Once I summited Ellingwood, it sort of occurred to me, I had forgotten the way down – having only done it three years ago, and in the middle of the day! So I carefully picked my way through the obstacles, chasing cairns and trying not to get cliffed-out. Mostly successful.
Once down on more stable ground, I completely forgot how far it was to any reasonable site to stop- more than three miles of hiking awaited me before I bivvyied for the night at the first somewhat flat, somewhat dry, somewhat talus-free patch of earth. If there was a trail, I did a terrible job of following it. Tons of water in the area. Really amazing terrain back there, for sure.
My plan in the morning was to take Little Bear’s Northwest Face up, but upon waking right below the face, and seriously lacking in coffee, I balked, and instead hiked a half mile farther downhill to start up the hourglass route. “If only, if only”, of course, but if only I had a slightly earlier start the day before, ascended C2 rather than C-whatever-death-trap I did, I might have felt a little more rested to take on the NW Face – it looks divine.
The Hourglass route went just fine – when compared to the face between C3 and C2, I was on pretty solid AF terrain, and I was soon on top of Little Bear, staring down the Little Bear-Blanca Traverse.
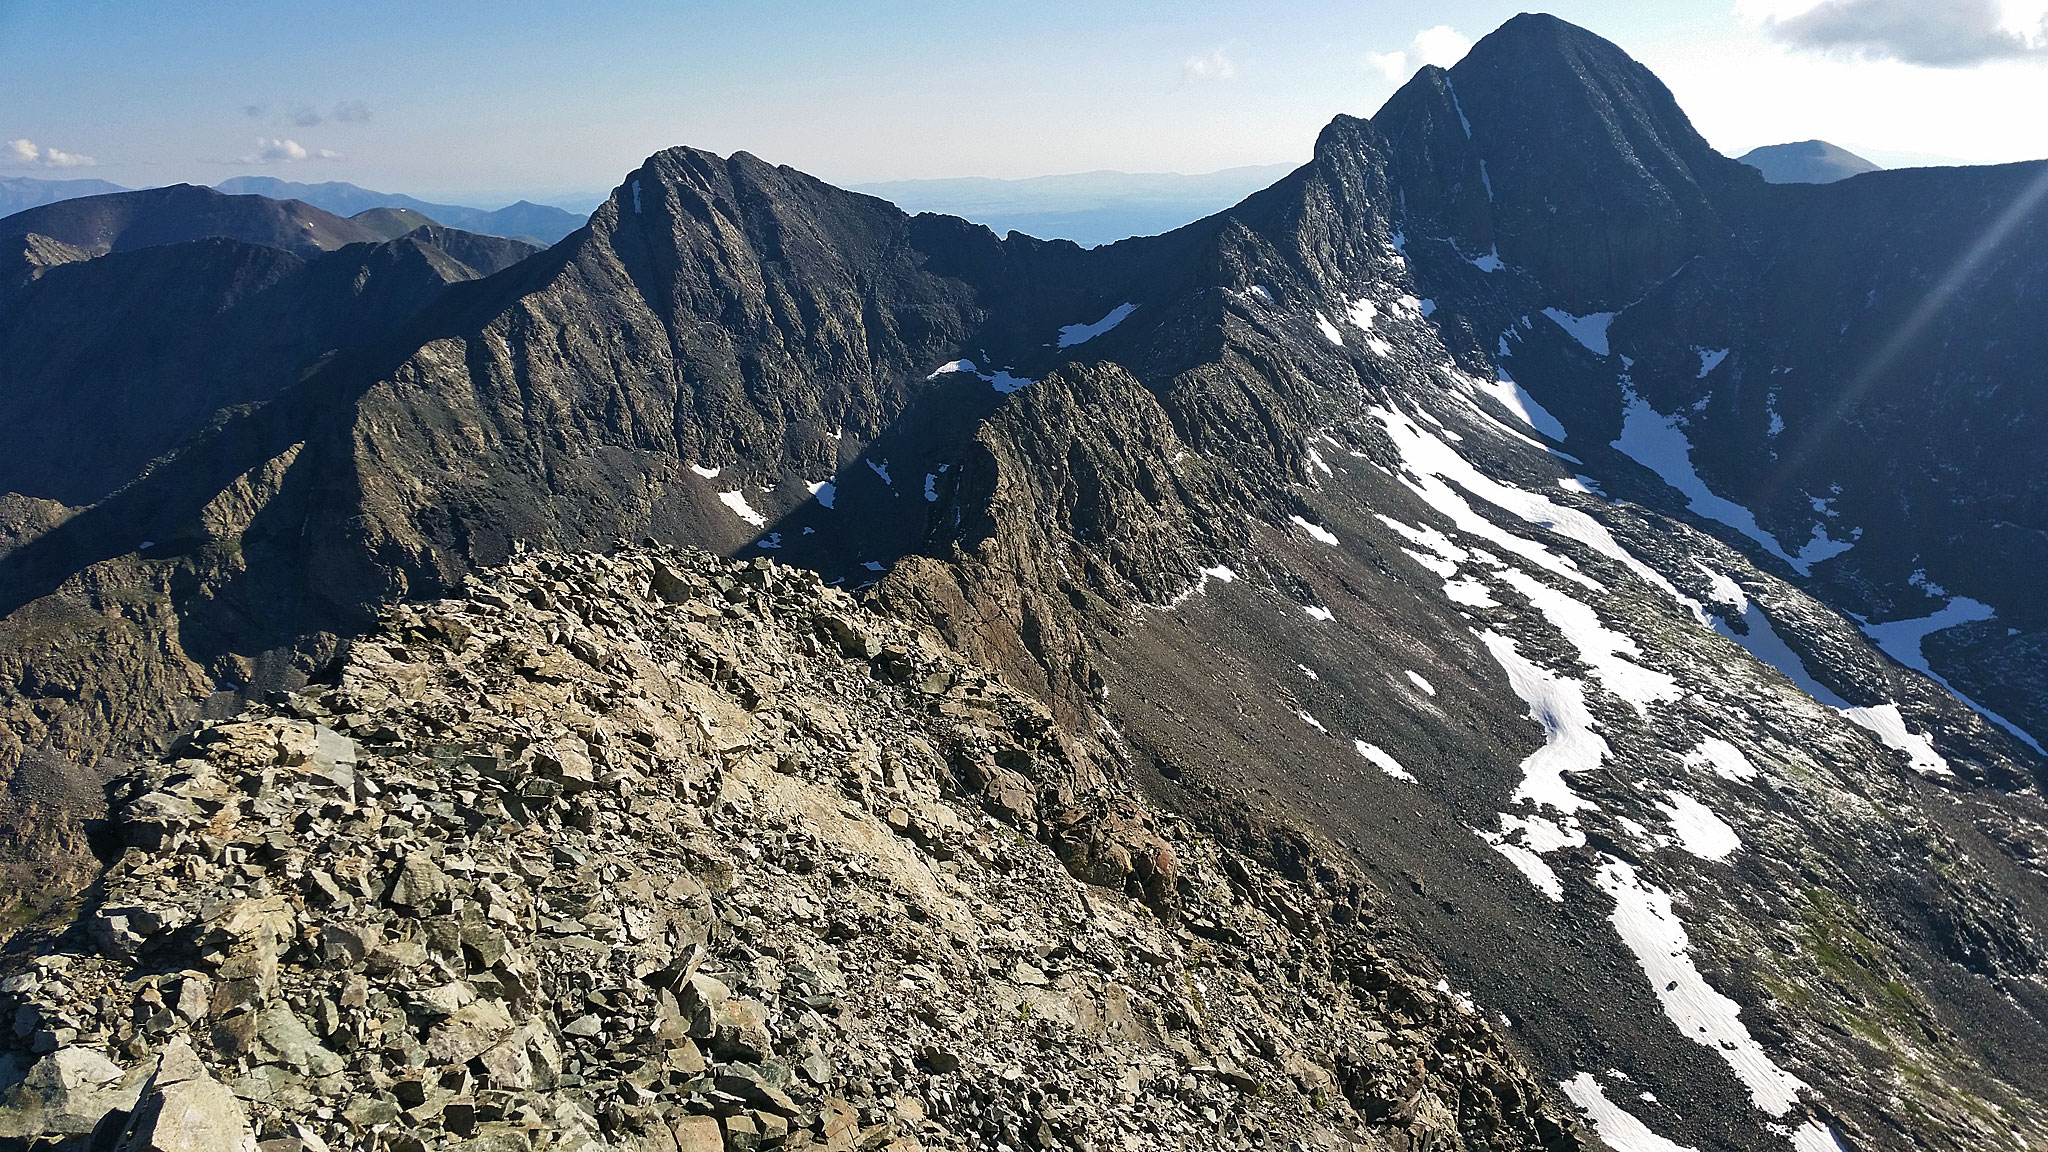 Little Bear – Blanca Traverse; Ellingwood to the left
I was happy the weather was clear for the time being – the last time I did the traverse, I was engulfed in a thick fog, and couldn’t see more than 20 feet in front of me. The exposure is real, and there were many places where thoughtful movement is required. I absolutely fell on my ass somewhere along this traverse, but without any major consequences – I just flopped right on top of the ridge. Whoops.
Soon, though, the weather was already changing, as dark clouds were moving in from the west. I topped out Blanca safely enough, but had to make a pretty big decision on where to go from here.
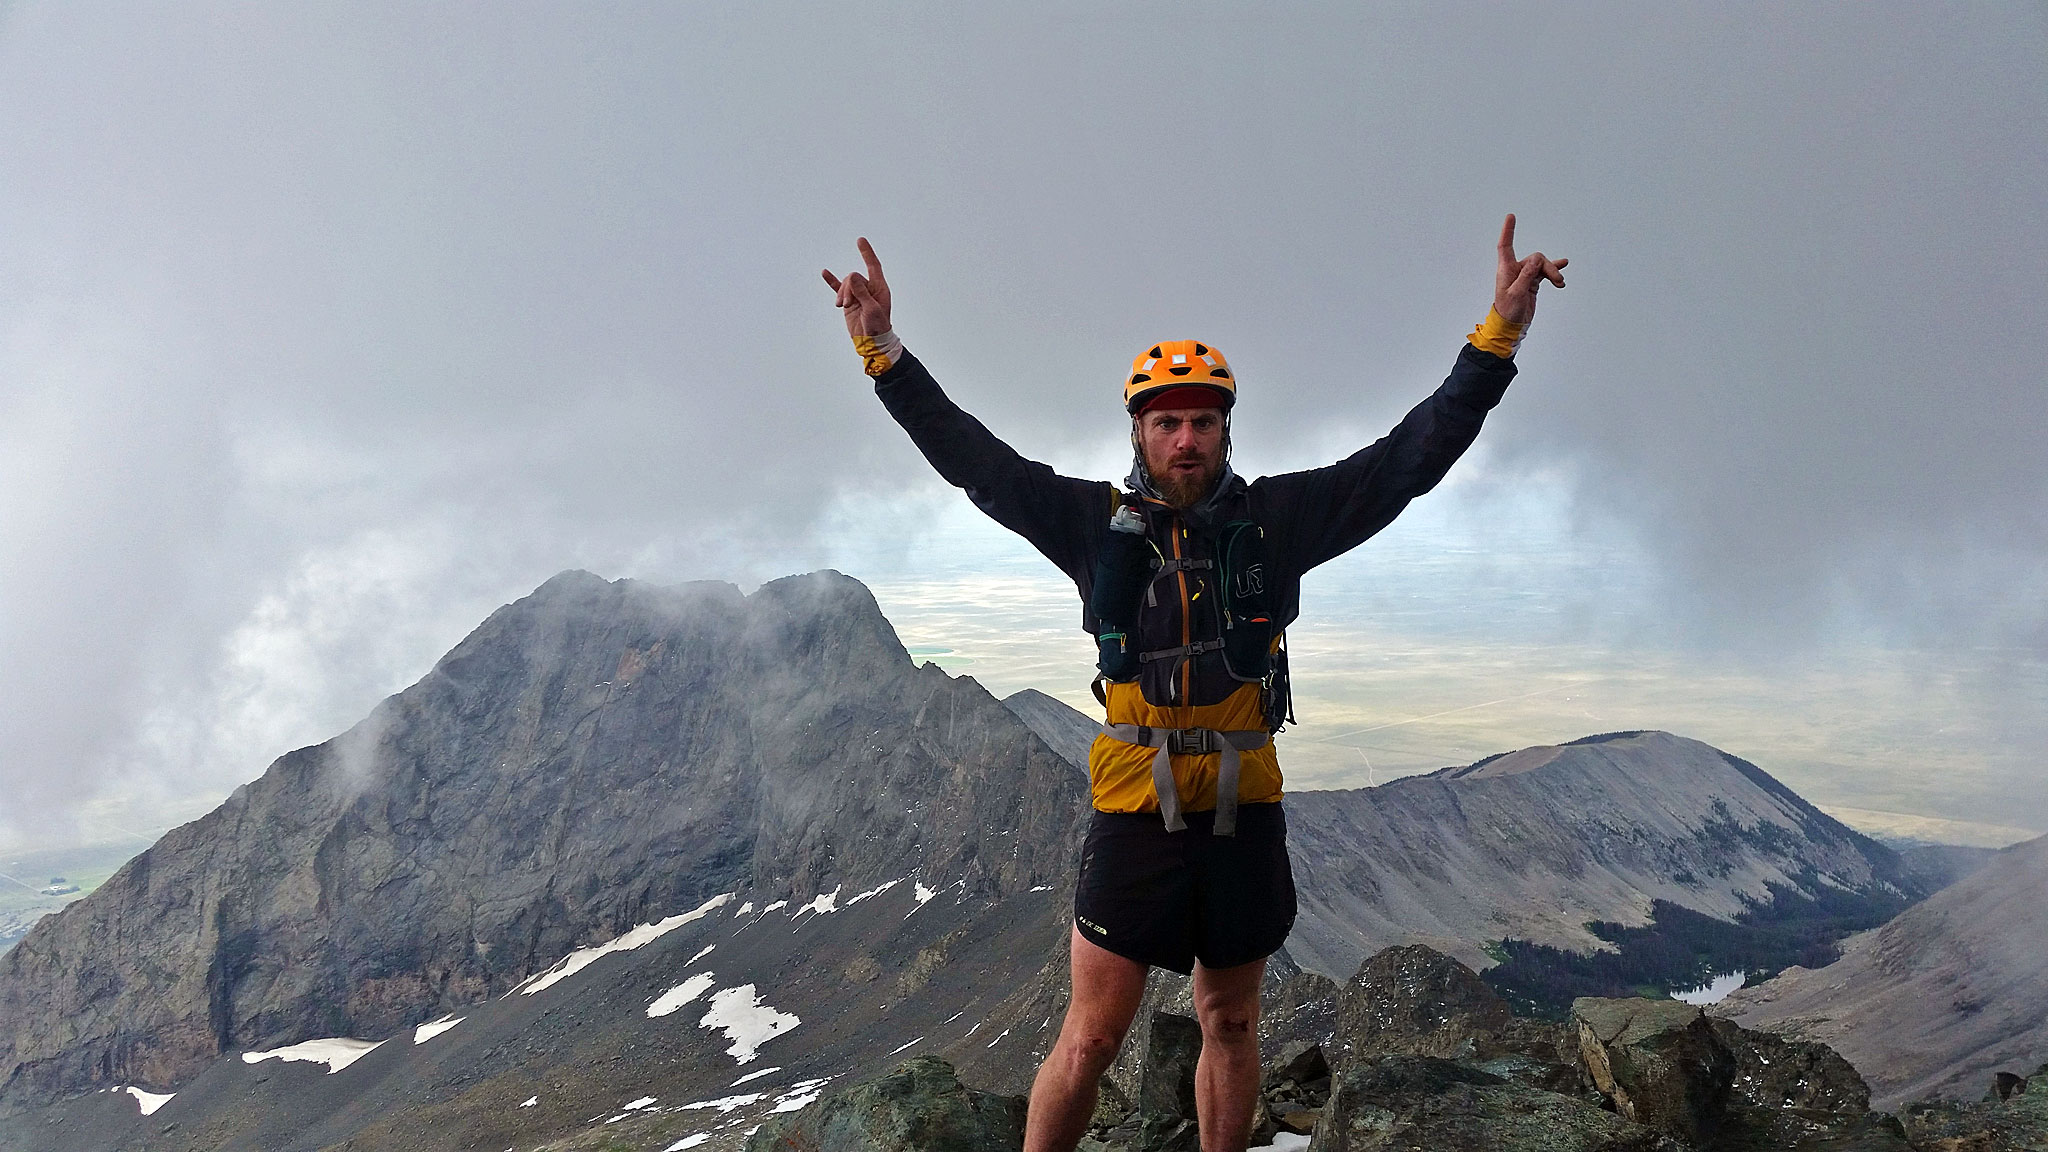 Blanca Peak! Clouds not far behind
The most direct route to my next objective, Mt. Lindsey, would be Gash Ridge (5.4). Not the place I wanted to be in a thunderstorm. There is a Class 4 alternative down Blanca’s South Ridge, and I had a little bit of beta on it, but not too much. It could afford a bit less exposure from lightning if thunderbooms started happening. For this reason, I chose the longer, but perhaps less technically difficult Class 4 alternative
The south ridge down Blanca is quite fun/easy scrambling, the problem was, I had no idea when and where to set off from the ridge and descend into the Winchell Lakes Basin. I passed one ridge going down towards the lakes, but decided to keep descending down the south ridge, until I came to another area that seemed to afford a passage the way I wanted to go. It was slabby, although covered in gravel, but had enough ledges between the slabs to make it doable, until it didn’t.
I’ve never come across such a formation before, but I found my way blocked by twin gullies – one facing ~north; the other one ~south, with a catwalk between them, and a large buttress beyond. Scrambling up onto the buttress was a bit shaky, and it seemed to just drop off vertically to the basin below. I tried out the north-facing chute, but it was covered in snow and I quickly backtracked my way to the top on very crumbly, orange rock. The south facing gully was pretty much snow free, but very steep, and very, very loose – the type of loose where you sink into the talus, and every step rains loose rock down. My fear was that rock above me would dislodge from my movement and cause the start of a very bad headache.
Nothing to do but give it a try, I guess, I’ve committed this far, and I had much more to do even today. I carefully made my way down, hugging the left side of the gully, and tip-toeing around any cliffbands and snow patches I found – the bottom of the gully being the most difficult when it came to steepness. I listened to music and tried to enjoy the death terrain as best as I could. And soon enough, I was down.
 South Facing Gully (of death) off of Blanca’s South Ridge. Here be dragons.
Researching the Gash Ridge Class 4 Alternative, I initially thought I WAY overshot my descent route, and that I should have perhaps taken the first very steep ridgeline going east. Looking at Roach’s 14ers book, I did overshoot the Class 4 Alt., but only by a few hundred feet. Roach only gives one waypoint on where you would crest the ridge, which I passed, but doesn’t give a whole lot of detail on what the ascent from Winchell Lakes really is like, except that there’s a, “Class 4 Ramp”. I didn’t see any terrain that looked great to the North, so be very aware the terrain here is confusing, and potentially dangerous.
Once in the Winchell Lakes area, I hiked towards Gash Ridge, hoping to find a break in the ridge to traverse over to the other side. I did this, but to my dismay, I found that I would need to climb yet another ridgeline spur to the north of Gash Ridge to get into the right drainage I wanted. Perhaps it would have been best to gain the Gash Ridge, then follow the ridge east a little more closely, rather than dropping down. Whatever my line was, it was a lot of work to climb back up, once down in that basin, but finally after starting near Lake Como, I was at a good stopping point in the Huerfano Valley, where I bivvied down near an actual trail that I knew would lead me to Mt. Lindsey in the morning. As sometimes happens, I knew where I was, but was turned around completely on where I was in the terrain itself.
 Bivvy After Ellingwood/Little Bear/Blanca in the Huerfano Valley
Although I ended my day pretty early, I started the next day well before sun up. My plan was to Summit “Huerfano Peak” and be at the base of Lindsey before dawn, and I just about kept that that plan. The Iron Nipple (Bonus!) and “Huerfano Peak” were easy summits even in the dark, and Lindsey itself was fun.
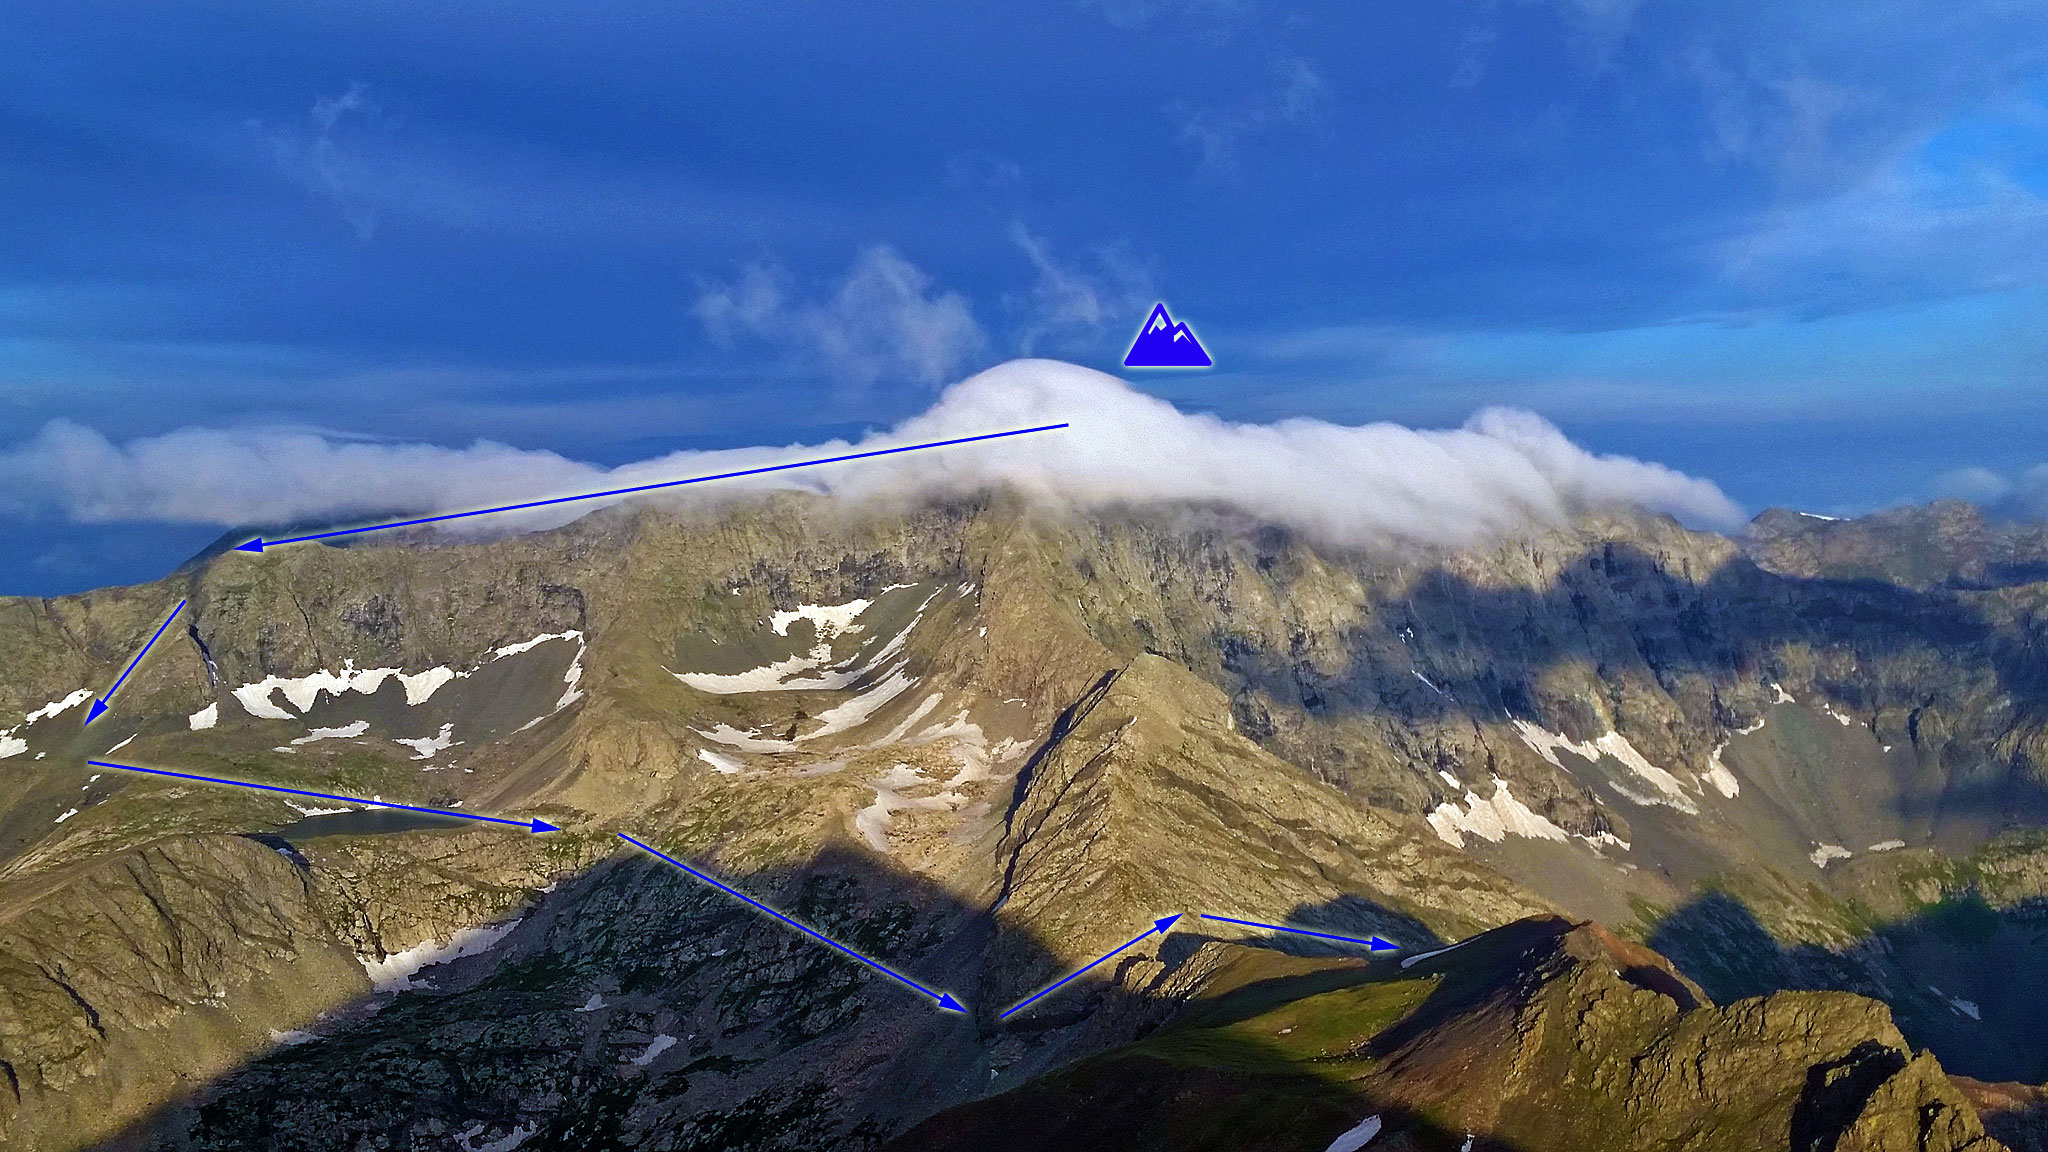 Morning on Lindsey, with Blanca blanketed in clouds. Route from Blanca shown (roughly).
With 5 summits down, it was time to wrap this up: summit California, then make it back to the trailhead, 11 miles away from my bivy spot.
I had mapped out what seemed to be a direct and “reasonable” way from my bivy spot to California, but had no idea what the terrain would be like. I followed the trail that leads to the Lily Lake/Huerfano trailhead to around 11,900′, the cut left up and over a small rise, and down towards the Huerfano River. It was all bushwhacking to the river, where I hoped to cross a trail that goes to Lilly Lake. It proved to be a bit difficult, as the terrain constantly cliffed out on me. I negotiated the cliffs by finding a sneak around them, or just climbing down the cliffs themselves. The real danger was all the wet grass and pine needles, which conspired against my insistence to stay upright on two feet. You could really screw this area up. Right before hitting the river, I found a different trail from the one I was expecting. Piled right by the trail was a winter’s worth of chopped firewood, all in a neat row, having been left years ago to rot and melt together. Very strange!
Once I crossed the river, a new challenge awaited me: tons of bear scat and bear paw prints, all reasonably fresh – almost steaming! I really wasn’t looking forward to bumping into that bear, but the trail the bear was making was the easiest way to bushwhack through the forest – especially near the river! I could very well tell what the bear was up to, digging into logs to eat grubs, taking a nap over here, smashing through the brush afterwards spooked at something, eating an errant hiker ever so often.
The dense forest made way for another series of glacier smoothed cliffs that led me out of treeline, towards my destination. A beautiful view, but what I had hoped to be an easy Class 2 talus hike up towards California was blocked by a hanging cliffband, several hundred feet above the start of the talus.
There didn’t seem to be many options to the west/south of my immediate area that would afford an doable route up to California – the only one that’s really documented is the North Ridge route of Ellingwood, and that was clear across the other side of the basin a few miles away. Even if I negotiated the tricky 5.2 climb, I still would need to take the complicated ridgeline to California. I only had enough food with me for a feeble lunch, so I wanted to get a move-on.
Keeping with the theme of, “let’s just take a disgustingly awful route, because I am impatient!”, I searched for a weakness in the cliffband, and found a small, 10 foot wide area that looked climbable. I negotiated the talus up to this weakness, and found it would go, but everything in this sneak was loose – you know: there’s a reason why the cliffband relaxes here – bad rock!
Ever so gingerly, I made my way up the weakness, only to find more loose terrain above. I would wipe away kitty litter gravel from a handhold, only to have the entire hand hold break away, and more kitty little gravel rain from above.
“OK”, I thought, “we’ll have to take this slow and carefully”.
I traversed from the face I was climbing to the ridgeline itself, where I could at least climb loose, horrible rock while straddling the two faces. As I progressed, to my relief, the rock quality became a bit better, and the angle eased. I reached an unnamed summit, with a clear and easy ridge line in front of me to California. Home free!
The hike to California was thankfully uneventful, and the descent – although long, proved easy enough. I picked up the very, very faint trail I spied on the way up, two days before, and finished up, almost exactly the time I had anticipated, rejoining my bike, being greeted by the ever watchful camphost. The camphost had shared the itinerary with his brother (I think), who was a little bit confused as to my route – my 3 minute napkin topo wasn’t very accurate. I may have been just as surprised as both of them to have finished without any major complications.
Looking at some more route descriptions for California, my ascent line up is actually fairly close to the established South Ridge route – I was simply just a little too far east of the line. One should instead travel all the way to Lily Lake – the trail I crossed that paralleled Huerfano River probably would have taken me right to the lake itself. Here’s what the line would look like, if you continued on the trail from Lindsey, down the basin, then to Huerfano River trail (in red:)
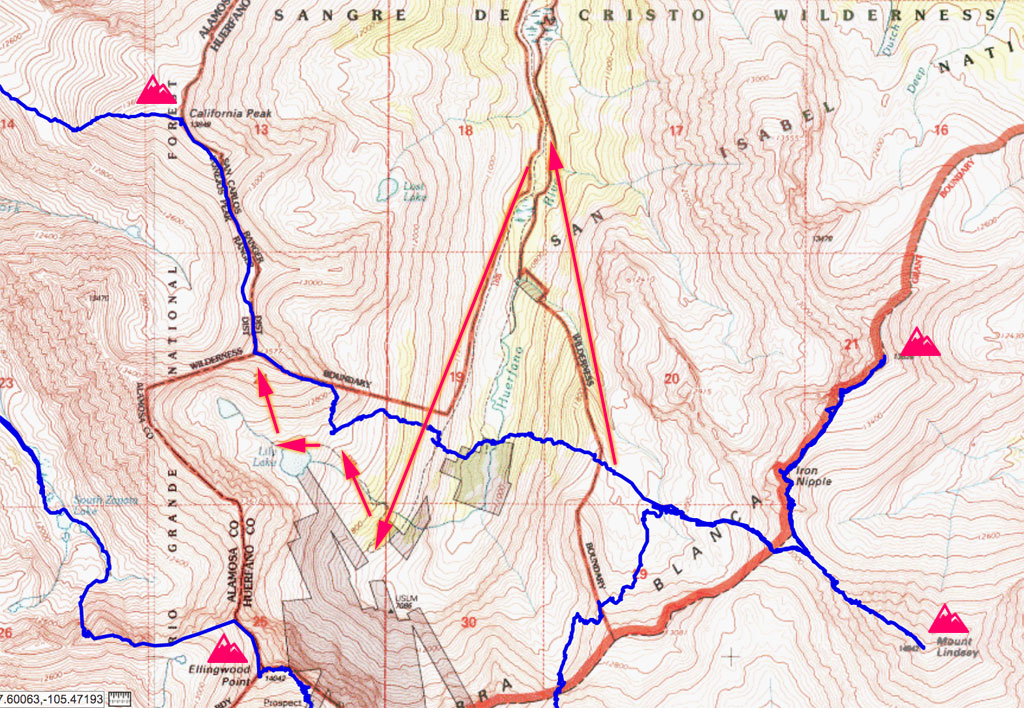 My line (blue), alt. line using trails and established south ridge route (red)
So much learned from this deconstruct of my route:
- Take the shortcut from the campsite to skip over Zapata Falls
- Take C2 to Ellingwood, rather than C3 or another unnamed gully, be prepared for snow. C2 is one mile shorter than C3
- Take the Northwest Face up Little Bear, rather than Hourglass – saves a mile.
- Take Gash Ridge off Blanca, don’t waste as much time descending to Winchell Lakes, but if you do, take the correct Class 4 alt. down and not my route, which is scary and dangerous.
- Consider just taking the trail from Lindsey to Lily Lake – it may be a tossup time-wise of going cross country, since there’s many scary cliffs to negotiate, but on the descend and ascent.
- Once at Lily Lake, do go west of my line to hit a potential class 2 route, instead of the scary terrain I found.
- If you would like to start from the east side of the range, you could do the route in a similar fashion, but start with California via its North Ridge route, traverse to Ellingwood via the Class 4 ridgeline, drop down to Little Bear’s NW face, traverse to Blanca, then finish up with Lindsey/”Huerfano Peak”. This line may be even a little shorter in mileage than starting from the west!
I can’t help but think that if I could correct these problems, the time it would take to finish this six peak enchainment would have been greatly improved. Ah! Next time, if there would ever be a next time. For those who will challenge the circuit in the future: I wish you luck and safety!
Clutch Gear
I read so many trip reports when researching this route about people planning starting from one side of the range, visiting the other, than finishing where they started. They have weather move in, or the terrain becomes too difficult to reverse, and they have to bail down a completely different drainage. Usually it was people who start from the east at Lily Lake/Huerfano, and then having to bail down Lake Como Road, since Como is the most heavily trafficked road and most familiar to people. Good place to hitch a ride, too. That wasn’t an option I wanted to exercise, unless completely necessary – like in an emergency. If weather moved in, I was willing to just wait it out.
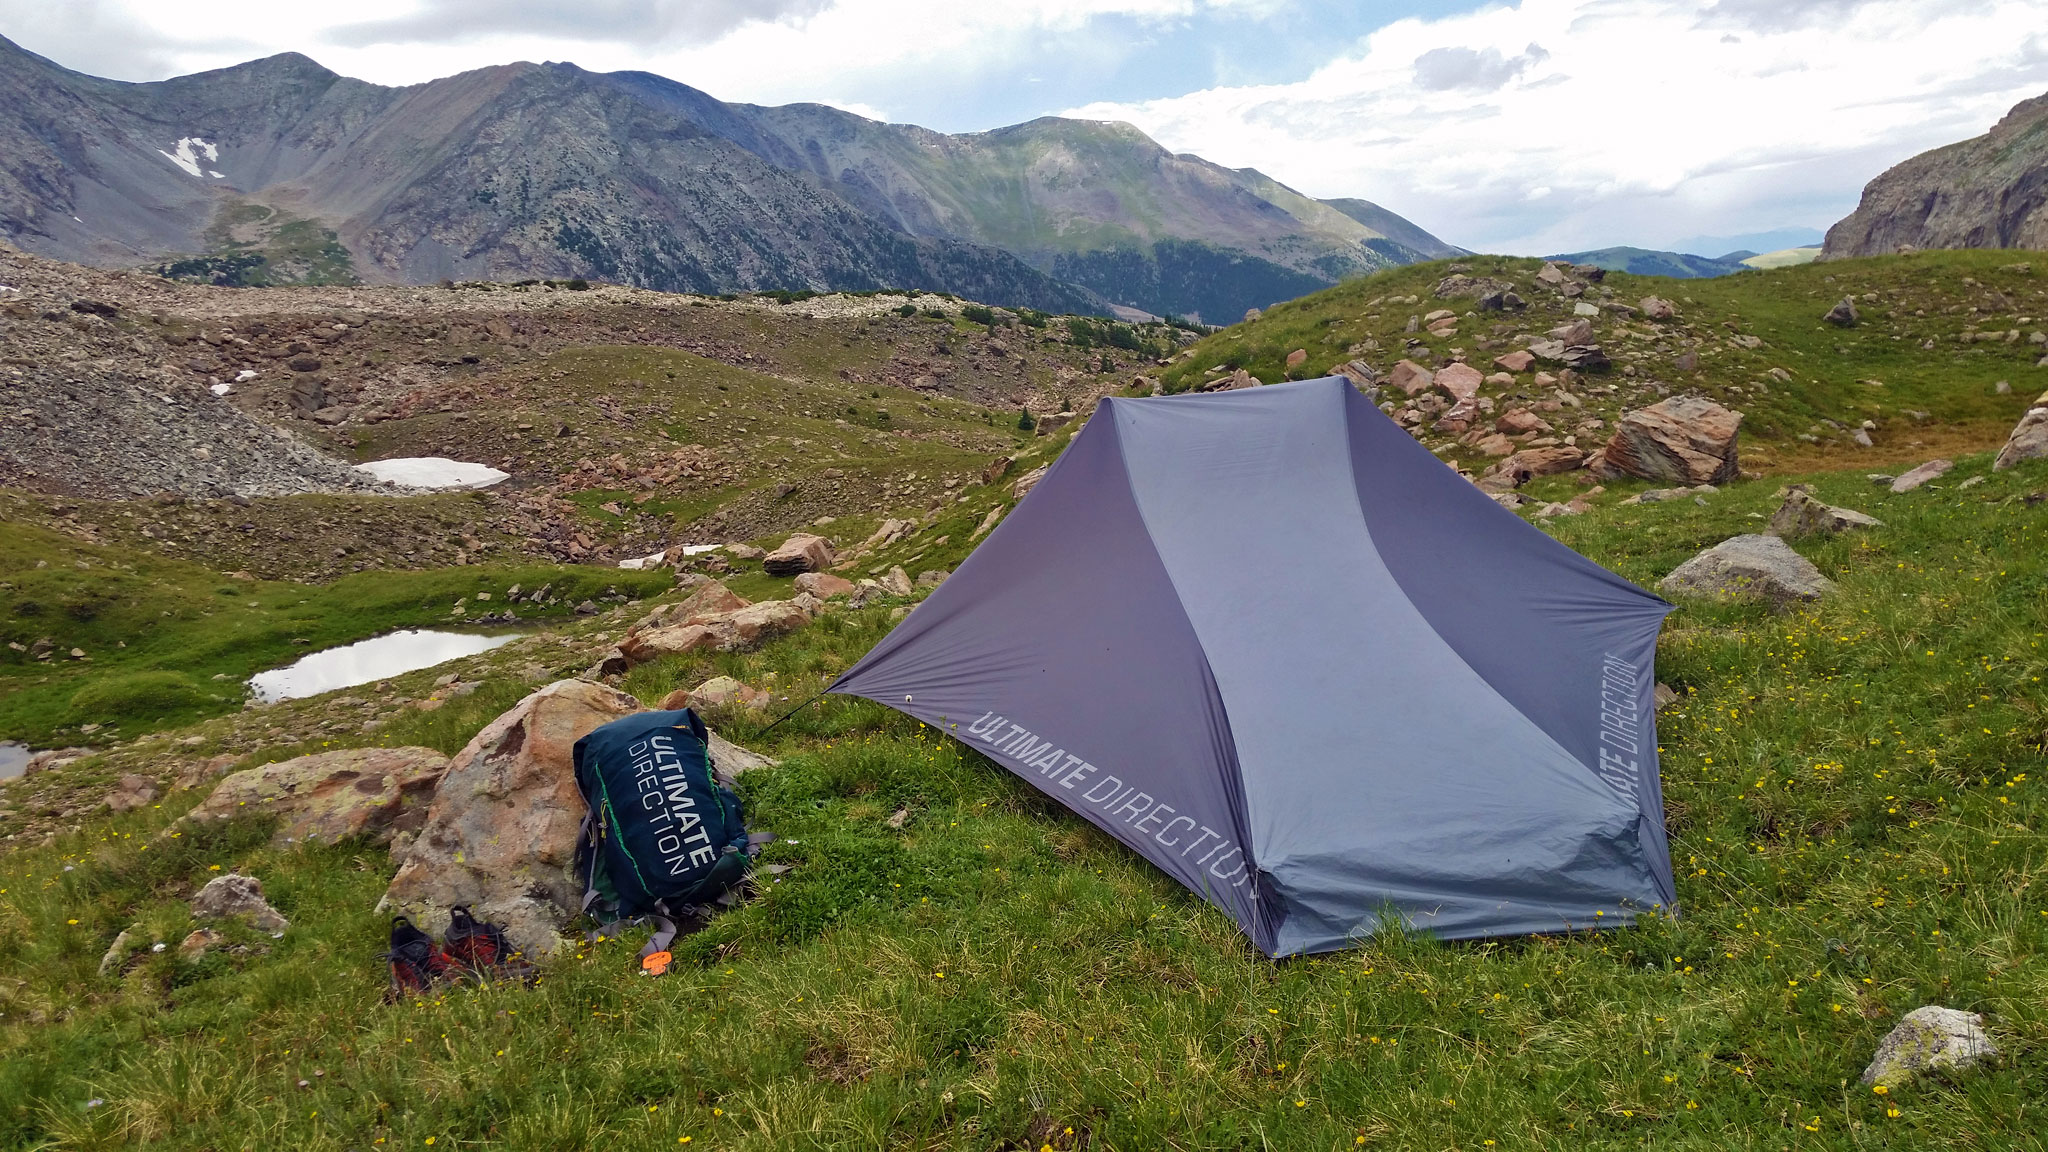
That’s why I designed this enchainment as a fastpack and brought along a sleep kit that would allow me to weather through almost anything. The sleep kit, three days of food, clothes, and other gear all fit in my Ultimate Direction Fastpack 35 which was comfortable enough to take on the technical/heinous pitches – like the Little Bear/Blanca traverse, which isn’t normally done as part of a backpacking trip! I break down my sleep system in a separate post.
Moving fast in the mountains means going light. Even though I was certain to hit technical terrain, like the aformentioned LB/Blanca traverse, I wasn’t going to bring along any additional climbing gear, like rock shoes – too bulky, too heavy. I became comfortable climbing everything on my entire trip utilizing the La Sportiva Mutant. The Mutant has a fairly sticky outsole, and a very aggressive tread pattern. The upper dries out fast, important for all those drainage/river/marsh crossings, and is super comfortable. Handled all the conditions I threw at it: sand, packed trail, talus slogging, snow, technical pitches, scary loose descents, etc.
More Resources
14ers.com route description of Ellingwood from Zapata Lake
Sangres Six Pack: LB to EP, Plus 3 trip report describes the Ellingwood to California linkup.
Strava Page for this route – use this to download the GPX. but don’t use the GPX for your own navigation – hopefully you’ve read about all the mistakes I’ve done, and how I put myself in dangerous, but avoidable terrain.
Edits
- Thanks to everyone who noticed I cannot spell, “Huerfano”. Fixed.
- Fixed the label to the C3 Couloir.
- I fixed my report about taking the, “incorrect” Class 4 ramp. If I was offroute of Roach’s description, I was only off a few hundred feet, and not like, a quarter of a mile. I guess its safe to say that the down climb from the South ridge of Blanca is confusing. Perhaps it’s easy to spot from the basin?

Awesome write up thanks for the beta, man. Read your article in bikepacking.com about the Tour of the highest hundred, pretty inspiring stuff!
[…] to the Colorado Sierra Blanca Centennial Enchainment, the Crestone Centennial Enchainment is much more straightforward. Still, strategy is much the […]
Interesting route choice. The drop between Huerfano and California sucks, and the one from Ellingwood to Little Bear is unfortunate given the easy traverse from Blanca to Ellingwood, but I can’t figure out anything more efficient coming from the west. From the east, Lindsey -> Gash Ridge -> Little Bear -> Ellingwood -> California would be better, but then of course you have to bike all the way around the “back side” of the range. The planning that went into your adventure is insane.
[…] as a, “Fastpack from Hell”, as the numbers really don’t compare to the Crestones, Sierra Blanca – let alone the mighty Weminuche. A motivated person, starting early with fine weather, could […]